How to Remove Mold From Shower Caulking?
Table of Contents
Mold is a common problem in the bathroom, and it is usually found in shower caulk. It can quickly multiply in a moist and warm environment, and what could be warmer and more humid than a shower?
Mold isn’t just an eyesore; it can also be dangerous to those with respiratory conditions and cause serious health issues. Are you looking for the best answers on how to remove mold from shower caulking? Well, we are going to discuss some effective ways to remove it, along with the reasons for mold growth and how to prevent it.
So, let’s get started.
Causes of Mold Growing in Shower Caulk
Here are a few of the reasons for mold growing in shower caulk:
Moisture
This is the most common cause of mold growth in shower caulk. When you have a warm and moist environment, it creates an ideal condition for molds to grow. Moreover, the moisture from your body plus humidity creates even more favorable conditions for them to thrive. What’s worse? Bathroom tiles are also perfect surfaces on which molds can grow.
Pores in the Shower Caulk
Just like tiles, shower caulking is also porous. It easily absorbs moisture, which causes damage. When a moist environment is surrounded by water-absorbing surfaces, mold growth becomes inevitable.
Lack of Ventilation
It is another common problem in the bathroom. If your bathroom doesn’t have proper ventilation, it will create a moist and warm environment that is perfect for mold growth.
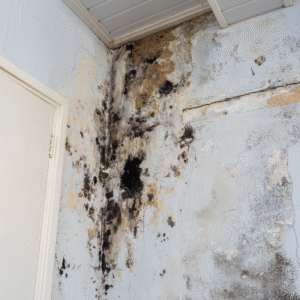
Is Black Mold in Shower Dangerous?
Yes, black mold in the shower can pose health risks, particularly for sensitive individuals or those with underlying medical conditions. Exposure can cause respiratory issues, skin irritation, and can trigger asthma attacks in people with pre-existing asthma. So, if you see any signs of mold growth in your shower caulking, be sure to take action right away.
How to Remove Mold From Shower Caulking?
You can’t just remove the shower caulk whenever the black mold starts growing. If you do, it will leave a gaping hole in your shower, perfect for water to seep through and create more damage.
Here are a few ways on how you can remove the mold from your shower caulking:
1- Removing Mold with Vinegar
This is one of the most popular methods for removing mold. All you need is white vinegar and a spray bottle. First, mix the vinegar with water in a 50:50 ratio, then spray it onto the moldy surfaces. Let it sit for about 15 minutes before scrubbing it off with a brush or sponge. Be sure to wear gloves as vinegar can cause skin irritation.
2- Removing Mold with Baking Soda
Another popular way of removing mold is by using baking soda. Mix the baking soda with water to make a paste, then apply it to the moldy surfaces. Let it sit for about 15 minutes before scrubbing it off. Be sure to wear gloves when doing this and avoid getting any of the mixtures in your eyes.
3- Removing Mold with Bleach
Bleach is a powerful disinfectant that can kill surface mold and bacteria, but it requires proper dilution to avoid toxic fumes, surface damage, and respiratory irritation. Following CDC guidelines, mix 1 cup of household bleach with 1 gallon of water (approximately a 1:16 ratio). Spray the solution onto the caulk and allow it to sit for 10 to 15 minutes—a shorter contact time than milder alternatives due to bleach’s aggressive chemical strength—before rinsing thoroughly with water.
4- Use Hydrogen Peroxide Solution
Another environmentally friendly approach to eliminating mold from your shower caulk is hydrogen peroxide. We recommend using 3 percent hydrogen peroxide. Spray the peroxide over the caulk until it is moistened. Allow it to soak for 10 minutes before scrubbing it with a brush or sponge. When you’re done, use a towel or paper towel to dry the surface thoroughly.
5- Borax
The last way to remove mold from your shower caulking is to use borax. We recommend mixing 1 cup of borax per gallon of water (or 2 tablespoons per two standard measuring cups of water for smaller batches). Put the solution in a spray bottle, then spray it over the caulk until thoroughly moistened. Let it sit for about 20 minutes before scrubbing off any visible residue with a brush or sponge. Wear gloves during application to prevent skin irritation.
6- Replace the Caulk
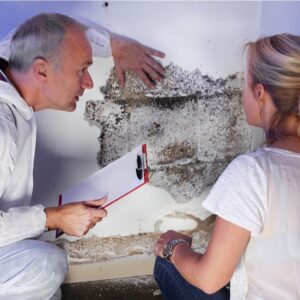
If mold has deeply penetrated and structurally damaged the seal, the caulk must be completely replaced, as surface cleaning will no longer be effective. For severe or widespread infestations behind the tub or shower lips, a professional assessment is highly recommended before resealing. When replacing it yourself, choose a high-quality, mold-resistant 100% silicone caulk rather than latex, as silicone provides a highly flexible, non-porous barrier that resists physical tearing and moisture breakdown over time.
How to Remove Mold from Silicone Shower Caulk?
For stubborn mold on silicone shower caulk, you can use a safely diluted bleach solution. Mix one part household bleach with ten parts water, spray it onto the caulk, and let it soak for no more than 15 minutes. Scrub gently with a soft brush or sponge to avoid tearing the seal, and always wear gloves and ensure the bathroom is fully ventilated.
If you feel you can’t handle the job yourself or if the mold is too widespread, we suggest hiring a professional to do it for you. At Moldtesters561, we have experienced professionals who can handle any mold infestation. So, contact us if you need mold inspection and removal.
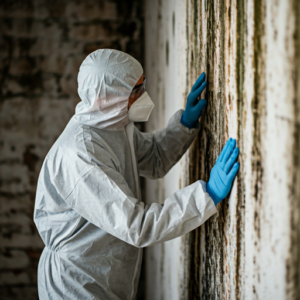
Tools and Protective Gear To Remove Mold
Here are a few of the tools that you should use while removing mold:
- Wear heavy-duty gloves and eye protection to protect your skin and eyes from chemical cleaners.
- A respirator may be necessary to protect against inhalation of mold spores. A dust mask is not practical in preventing mold inhalation.
- To remove the mold, use a nylon scrub brush or scrubbing pad. Avoid stiff wire brushes, which can slice or gouge the caulking and create new crevices for mold to grow.
- An old toothbrush can also be used to clean tight spaces and corners.
- Once the mold is completely dead and the surfaces have been thoroughly cleaned and sanitized, a wet vacuum or shop vacuum with a HEPA filter can be used to remove residual water. Never use a vacuum on active, dry, or untreated mold, as this can unsafely aerosolize mold spores into the air.
- Towels, buckets, and mops are used to clean up the work area and spills.
- Plastic sheeting to protect floors and furniture from damage.
If you have black mold in your shower caulking, it’s essential to take action right away. However, if the mold has already damaged your caulking, it’s time to replace it.
How to stop Black Mold from Growing in the Shower?
The best way to prevent black mold in your shower caulking is by taking proper precautions. Here are a few tips:
1- Ventilate your Bathroom
Keep the bathroom well-ventilated, as this will help get rid of excess moisture. Install an exhaust fan if you don’t have one, and make sure it’s always running when you’re taking a shower. Open the windows and door to allow fresh air in while you’re showering.
2- Regularly clean your shower
A build-up of soap scum and dirt can create a perfect environment for mold to grow. Clean your shower frequently, including caulking and grout lines.
3- Use Vinegar Solution often
A vinegar solution is a great way to prevent mold from growing. Spray it onto the caulking and grout lines after you’re done showering. This will help get rid of any excess moisture and disinfect the surfaces.
4- Use a squeegee to remove moisture
After every shower, use a squeegee on the tiles and caulk lines to wipe away standing water. While daily squeegeeing drastically reduces surface moisture, it should be paired with proper ventilation to ensure the bathroom dries completely.
5- Assess caulk more frequently
Perform frequent visual checks of your shower seals. If you spot early signs of mold development, clean the area immediately with vinegar or a mild disinfectant before the fungi can penetrate deep beneath the caulk layer.
6- Measure Humidity Levels
If you’re having trouble getting rid of the mold, the humidity levels in your bathroom may be too high. Measure the humidity levels and try to keep them below 50%. A dehumidifier can help.
If you follow these tips, you can help reduce the chances of black mold forming in your shower caulking. However, if it does start to grow, don’t hesitate to call a professional to remove it.
Final Thoughts
When removing the mold from your shower caulking, you must take your time and be thorough. If you leave any traces of mold, it will just grow back and become even more challenging to get rid of. And if the black mold is left untreated, it can cause more damage to your bathroom. We hope that you get an idea of how to remove mold from shower caulking by now. So be sure to act quickly and start removing the mold from your shower caulking today.
If you are looking for professional help, call us at (561) 886-8241 for all your mold removal needs. At Mold Testers 561, we have a team of experts who will be happy to assist you with the process and ensure the job is done right.